When people make fun of ultralight backpackers they always give a particular example of radical, ridiculous, over-the-top weight-saving behavior. I know you know what it is. Cutting the handles off toothbrushes, right?
Well I always laughed at that also. Until recently when I started putting my gear together for a three-day hike on the west rim trail of the pine creek gorge. I noticed that the child's toothbrush that I take backpacking was getting pretty worn out. So I went to look for a new one. Ack! Have you seen the toothbrushes these days? They are ridiculously heavy! The plastic is needlessly thick and the handle is covered with a heavy layer of rubber. Good heavens! Why the heavy duty construction? This is for brushing teeth, not chipping away at glaciers. Even if I weren't a backpacker I would be offended at wasting that much of the earth's resources on a toothbrush.
So I've officially joined the ranks of the backpacking radicals. A few minutes with my dremel tool and the toothbrush is about the size and weight that any human really needs. On the left is the old toothbrush I'm replacing and on the right is the new radicalized toothbrush.
I'm really excited about this upcoming hike. I'm going with two other backpackers who've hiked this trail before. We are leaving early Monday morning and I'll return on Wednesday evening. I'll be sure to post some pics.
Saturday, April 23, 2011
Saturday, March 19, 2011
Dealing with Wet Wood
A friend of mine and I are planning a long backpacking trip this summer, 70 or 80 miles in 6 days. In thinking about the logistics of taking an extended backpacking trip I began to wonder how the backcounty boiler that I reviewed in my last post might work as a stove system for the trip. It's appealing to think that I might not have to carry any fuel for my stove. Fuel planning is a bit of a stress because there's always some uncertainty about how fast you will go through your fuel. I've certainly had my fair share of accidentally spilled pots of hot water which have required me to boil again -- using twice as much fuel as I had planned for that meal. Liquid fuels can also leak or spill (although I haven't had this happen yet) leaving you with less than you might need to finish your hike.
However if you take a wood stove and plan on collecting your fuel then you must face the possibility (especially in this part of the country) of rain, perhaps for extended periods, such that the only wood you will find will be wet. I thought about carrying esbit solid fuel as a backup. Initial tests using esbit in the boiler were a bit unsatisfactory. Then it occurred to me that perhaps the best use of an esbit cube would be to dry out the wet wood. So I performed the following test to see if that strategy might work.
After having done the test I'm now wondering if I could get away with less than I cube. Also I'm wondering if there are other alternatives to use in the boiler when the wood is wet. Any thoughts?
However if you take a wood stove and plan on collecting your fuel then you must face the possibility (especially in this part of the country) of rain, perhaps for extended periods, such that the only wood you will find will be wet. I thought about carrying esbit solid fuel as a backup. Initial tests using esbit in the boiler were a bit unsatisfactory. Then it occurred to me that perhaps the best use of an esbit cube would be to dry out the wet wood. So I performed the following test to see if that strategy might work.
After having done the test I'm now wondering if I could get away with less than I cube. Also I'm wondering if there are other alternatives to use in the boiler when the wood is wet. Any thoughts?
Thursday, March 17, 2011
Backcountry Boiler
I'm pretty excited about a new piece of gear I just received. It's called the Backcountry Boiler and it was designed by a backpacker in Pittsburgh named Devin Montgomery. His website is here. The lightweight backpacking community has been eagerly anticipating the release of the boiler. In the first run only 100 were produced and I was able to get one of those first 100. I'm looking forward to using this on upcoming hikes.
In a later post I'd like to talk about what to do when dry wood is not available.
Monday, March 7, 2011
West German Wool Army Pants
In continuing my winter gear theme I've decided to talk about pants for winter camping. Actually this is a review of a new piece of gear that I haven't really put to the test yet. I'll have to follow up some time in the future for a review of how these pants performed for me.
Back in January our local boy scout council held it's annual Klondike derby. For those who don't know what this is it's like a sled dog race where the boys are the dogs. They build sleds and pull them around a course, stopping at various stations where they must complete scouting skill-related activities. I volunteered to help at the Map&Compass station that our church congregation was in charge of. The day of the derby turned out to be one of the coldest days of the year. It was about 0F when we arrived in the morning. I was wearing two pair of long underwear under my nylon hiking pants (that I wear in all seasons). My upper body was fine because I had on many layers and a down parka. But my legs were a little cold. I mentioned it to one of my buddies who was there (who is a real outdoor expert)and he pointed out his wool pants.
Wool is great stuff as I've mentioned before. It's water and odor resistant, and has great wicking and insulating properties. Furthermore in a dense weave, such as you would have in a wool pant it is windproof. I love my merino wool tops and I've consider merino for a base layer on bottom but I had never thought about wool pants. So I set about looking for some.
The classic outdoor wool pants used to be the Malone pant made by Woolrich which is located not too far from me. However they seem not to make them any more. Or at least I couldn't find them on their website. I've found various places online where you can buy them and the going price seems to be about $90. A bit steep for a pair of pants I wasn't sure I would like.
Then I found a review of some West German wool army pants by a backpacker named pig-monkey. I hopped on eBay and soon found a pair just like he had talked about, and miraculously they were in my size. I got them for $16.
These pants are very cool. Military pants seem to be very well made. The waistband is adjustable with buttons inside and out. There are bar tacks on all the pocket seams and inside there are cloth panels over every seam as well as the crotch, waistband, and ankles.
The fly is button-up and there are lots of pockets. The knee area (from mid-thigh to mid-calf) has a double layer of wool (you can see the upper seam of the second layer in the photo to the right).
I tend to use the "cargo" aspect of my hiking pants a lot so I really like all the pockets. Each one has a button closure.
The flap on the cargo pocket is tacked down on the front so that the flap stays down even if it is unbuttoned.
Pig-monkey recommends lanolizing your wool outer clothing. That will increase the water-resistance of the pants.
I'll have to do some more experimenting.
Postscript: Shortly after this post I went outside wearing the pants to make snowmen with my kids. I purposely spent a lot of time on my knees in the snow to see how well the wool repels water. I was really impressed. At the end of the process I stood up and dusted off the snow and the pants were dry and my legs were warm. Pretty cool.
Back in January our local boy scout council held it's annual Klondike derby. For those who don't know what this is it's like a sled dog race where the boys are the dogs. They build sleds and pull them around a course, stopping at various stations where they must complete scouting skill-related activities. I volunteered to help at the Map&Compass station that our church congregation was in charge of. The day of the derby turned out to be one of the coldest days of the year. It was about 0F when we arrived in the morning. I was wearing two pair of long underwear under my nylon hiking pants (that I wear in all seasons). My upper body was fine because I had on many layers and a down parka. But my legs were a little cold. I mentioned it to one of my buddies who was there (who is a real outdoor expert)and he pointed out his wool pants.
Wool is great stuff as I've mentioned before. It's water and odor resistant, and has great wicking and insulating properties. Furthermore in a dense weave, such as you would have in a wool pant it is windproof. I love my merino wool tops and I've consider merino for a base layer on bottom but I had never thought about wool pants. So I set about looking for some.
The classic outdoor wool pants used to be the Malone pant made by Woolrich which is located not too far from me. However they seem not to make them any more. Or at least I couldn't find them on their website. I've found various places online where you can buy them and the going price seems to be about $90. A bit steep for a pair of pants I wasn't sure I would like.
Then I found a review of some West German wool army pants by a backpacker named pig-monkey. I hopped on eBay and soon found a pair just like he had talked about, and miraculously they were in my size. I got them for $16.
These pants are very cool. Military pants seem to be very well made. The waistband is adjustable with buttons inside and out. There are bar tacks on all the pocket seams and inside there are cloth panels over every seam as well as the crotch, waistband, and ankles.
The fly is button-up and there are lots of pockets. The knee area (from mid-thigh to mid-calf) has a double layer of wool (you can see the upper seam of the second layer in the photo to the right).
I tend to use the "cargo" aspect of my hiking pants a lot so I really like all the pockets. Each one has a button closure.
The flap on the cargo pocket is tacked down on the front so that the flap stays down even if it is unbuttoned.
Outside the cargo pocket,but still under the flap, is an extra little pocket that is just right for a small knife, or keys, or coins.
In the main compartment of the cargo pocket there are long ties to which you can tie small pieces of gear. The ties are long enough so that you can use the gear (say a knife, small flashlight, or compass) but it makes it impossible to lose by dropping. Very cool idea.
There are snaps around the ankles also so you can snap them tight to your ankles before you put your boots on. When snapped the pants can't ride up on your leg and get over the top of your boots to let snow it.
This works great with my NEOS. I had a chance to try it this morning because strangely the biggest snow of the year just arrived last night. I went out shoveling wearing these pants and was impressed with how well this feature works. In the past that has always been my problem when in deep snow.
The one thing that concerned me about these pants was that the reinforced knees seemed very stiff and made a crinkly sound when I walked. The knee area has a double layer of wool but there seemed to be some kind of papery material between the layers of wool. I opened up the bottom seam and found the culprit.
Removing it turned out to be easier than I thought it would be. The old reinforcing material rips easily and soon came out. I had to open one more seam to get to the part behind the cargo pocket. Here you can see the offending material after removal.
The entire procedure took only five minutes and the resulting product is quieter and more comfortable.
In the main compartment of the cargo pocket there are long ties to which you can tie small pieces of gear. The ties are long enough so that you can use the gear (say a knife, small flashlight, or compass) but it makes it impossible to lose by dropping. Very cool idea.
There are snaps around the ankles also so you can snap them tight to your ankles before you put your boots on. When snapped the pants can't ride up on your leg and get over the top of your boots to let snow it.
This works great with my NEOS. I had a chance to try it this morning because strangely the biggest snow of the year just arrived last night. I went out shoveling wearing these pants and was impressed with how well this feature works. In the past that has always been my problem when in deep snow.
The one thing that concerned me about these pants was that the reinforced knees seemed very stiff and made a crinkly sound when I walked. The knee area has a double layer of wool but there seemed to be some kind of papery material between the layers of wool. I opened up the bottom seam and found the culprit.
I imagine these pants were made back in the 60s or 70s. This reinforcing material seems to be coated with something that has stiffened up and cracked over the years. There was a fair amount of yellow dust on and around it.
Removing it turned out to be easier than I thought it would be. The old reinforcing material rips easily and soon came out. I had to open one more seam to get to the part behind the cargo pocket. Here you can see the offending material after removal.
The entire procedure took only five minutes and the resulting product is quieter and more comfortable.
Pig-monkey recommends lanolizing your wool outer clothing. That will increase the water-resistance of the pants.
Although I think these are very cool pants I'm still not sure how I will like them for backpacking. They are rugged, water-resistant, and warm but they are heavy. I may decide that I would prefer a rain pant over a fleece layer on bottom. Rain pants have their own downsides. They tend not to be as utilitarian in terms of pockets and such and the danger of condensation is high compared to wool.
I'll have to do some more experimenting.
Postscript: Shortly after this post I went outside wearing the pants to make snowmen with my kids. I purposely spent a lot of time on my knees in the snow to see how well the wool repels water. I was really impressed. At the end of the process I stood up and dusted off the snow and the pants were dry and my legs were warm. Pretty cool.
Monday, February 28, 2011
Winter Gloves for Backpacking
There is no gear choice more agonizing to backpackers than choosing gloves. Most backpackers end up with many pair, none of which is totally satisfactory to them. I've recently changed my glove strategy and so far I'm cautiously optimistic.
My previous pair of gloves were glove/mittens that I picked up for cheap somewhere. Mittens are warmer than gloves but don't allow you to do anything that requires much dexterity. The idea of this system is that you get the best of both worlds. You can fold back the part of the mitten that covers your fingers. Velcro on the back of the glove holds this top part in place. When in glove mode they are fingerless.
This seems like a great idea. The problem here was that the execution wasn't that great. Notice that in either mode your thumb is still encased. It turns out to be surprisingly hard to do things like use a lighter or tie a knot while your thumb is covered.
The other weakness of this is that it isn't waterproof. The material doesn't absorb water but snow or water can easily get under the flap.
I have a pair waterproof gloves also. They are SealSkinz gloves. These gloves are completely waterproof but the inner membrane is one-way breathable. I think they are probably designed for fisherman or paddlers rather than hikers. However they are nice for spring hikes when there might be cold rain or you might have to mop the frost off your tarp in the morning. They are windproof as well of course so they keep the chill off a bit. But there is no insulating layer so if it gets down near freezing your hands will be cold.
Backpackers tend to prefer a layering system with a waterproof outer mitten and an insulating liner glove inside. If you get too warm you can use either the liner by itself or the mitt by itself. I've looked at many such models and finally found one which I think will do well: Outdoor Research Meteor Mitts. Initially I had trouble finding these because REI's site has these under women's gloves. However if you start searching for Outdoor Research mittens and then select Unisex then you find these.
What's cool about these is that the liner is a glove/mitten, like my old ones. In fact these are much better because the thumb can be uncovered also. The fingers are not separated underneath like my old gloves but that was kind of a useless feature. This provides so much dexterity that I really can tie knots without getting down to bare hands.
The covers for fingers and thumb have little magnets in them that stick to tiny magnets on the back of the gloves to keep them out of the way. Nice touch I think. Since the liner is fleece velcro would be a pain.
The outer mitts are well designed also. The gauntlets come up quite far on your arm and can be cinched down to keep out snow. I've held them under running water and they seem to be highly water-resistant.
At the bottom of the picture the the left you can see part of a long loop of cord with a simple cord-lock. This puzzled me at first and then I realized that if I put this around my wrist I could take the mitt off and let it dangle without worrying about losing it. This means you can take off the outer layer without stopping to undo your pack. Very nice.
After using these gloves on two outings this winter I have concluded there is one minor design error. The mitt and the liner stay attached to eachother due to matching strips of velcro. This makes is surprisingly hard to get the mitt off. I found myself just removing the whole thing when I needed to use my fingers. I think I'll remove this velcro. I imagine the idea was to keep you from losing the liner. But the difficulty it imposes partly negates the advantage of having a liner which allows for finger dexterity. This is an easy modification so I don't mind having to do it.
I've used these gloves in very cold temps and I would say these gloves are good down to 10 F (-12 Celcius). Below this temperature I found my fingers getting cold if I were standing still. While walking I could keep my fingers warm down to somewhere around 0 F. If you are going to spend significant time below 10 F then I would recommend something like the Black Diamond Mercury Mitten. I considered these initially but decided they were overkill for my purposes and would provide only minor dexterity.
My previous pair of gloves were glove/mittens that I picked up for cheap somewhere. Mittens are warmer than gloves but don't allow you to do anything that requires much dexterity. The idea of this system is that you get the best of both worlds. You can fold back the part of the mitten that covers your fingers. Velcro on the back of the glove holds this top part in place. When in glove mode they are fingerless.
![]() |
| My Old Glove/Mittens |
This seems like a great idea. The problem here was that the execution wasn't that great. Notice that in either mode your thumb is still encased. It turns out to be surprisingly hard to do things like use a lighter or tie a knot while your thumb is covered.
The other weakness of this is that it isn't waterproof. The material doesn't absorb water but snow or water can easily get under the flap.
![]() |
| SealSkinz Waterproof Gloves |
I have a pair waterproof gloves also. They are SealSkinz gloves. These gloves are completely waterproof but the inner membrane is one-way breathable. I think they are probably designed for fisherman or paddlers rather than hikers. However they are nice for spring hikes when there might be cold rain or you might have to mop the frost off your tarp in the morning. They are windproof as well of course so they keep the chill off a bit. But there is no insulating layer so if it gets down near freezing your hands will be cold.
Backpackers tend to prefer a layering system with a waterproof outer mitten and an insulating liner glove inside. If you get too warm you can use either the liner by itself or the mitt by itself. I've looked at many such models and finally found one which I think will do well: Outdoor Research Meteor Mitts. Initially I had trouble finding these because REI's site has these under women's gloves. However if you start searching for Outdoor Research mittens and then select Unisex then you find these.
![]() |
| Meteor Mitt liners |
![]() |
| Liners with digits exposed |
The covers for fingers and thumb have little magnets in them that stick to tiny magnets on the back of the gloves to keep them out of the way. Nice touch I think. Since the liner is fleece velcro would be a pain.
The outer mitts are well designed also. The gauntlets come up quite far on your arm and can be cinched down to keep out snow. I've held them under running water and they seem to be highly water-resistant.
![]() |
| Meteor Mitt Shells |
At the bottom of the picture the the left you can see part of a long loop of cord with a simple cord-lock. This puzzled me at first and then I realized that if I put this around my wrist I could take the mitt off and let it dangle without worrying about losing it. This means you can take off the outer layer without stopping to undo your pack. Very nice.
![]() |
| My one gripe -- velcro which makes the shell difficult to remove |
After using these gloves on two outings this winter I have concluded there is one minor design error. The mitt and the liner stay attached to eachother due to matching strips of velcro. This makes is surprisingly hard to get the mitt off. I found myself just removing the whole thing when I needed to use my fingers. I think I'll remove this velcro. I imagine the idea was to keep you from losing the liner. But the difficulty it imposes partly negates the advantage of having a liner which allows for finger dexterity. This is an easy modification so I don't mind having to do it.
I've used these gloves in very cold temps and I would say these gloves are good down to 10 F (-12 Celcius). Below this temperature I found my fingers getting cold if I were standing still. While walking I could keep my fingers warm down to somewhere around 0 F. If you are going to spend significant time below 10 F then I would recommend something like the Black Diamond Mercury Mitten. I considered these initially but decided they were overkill for my purposes and would provide only minor dexterity.
Thursday, February 24, 2011
A Winter Hang
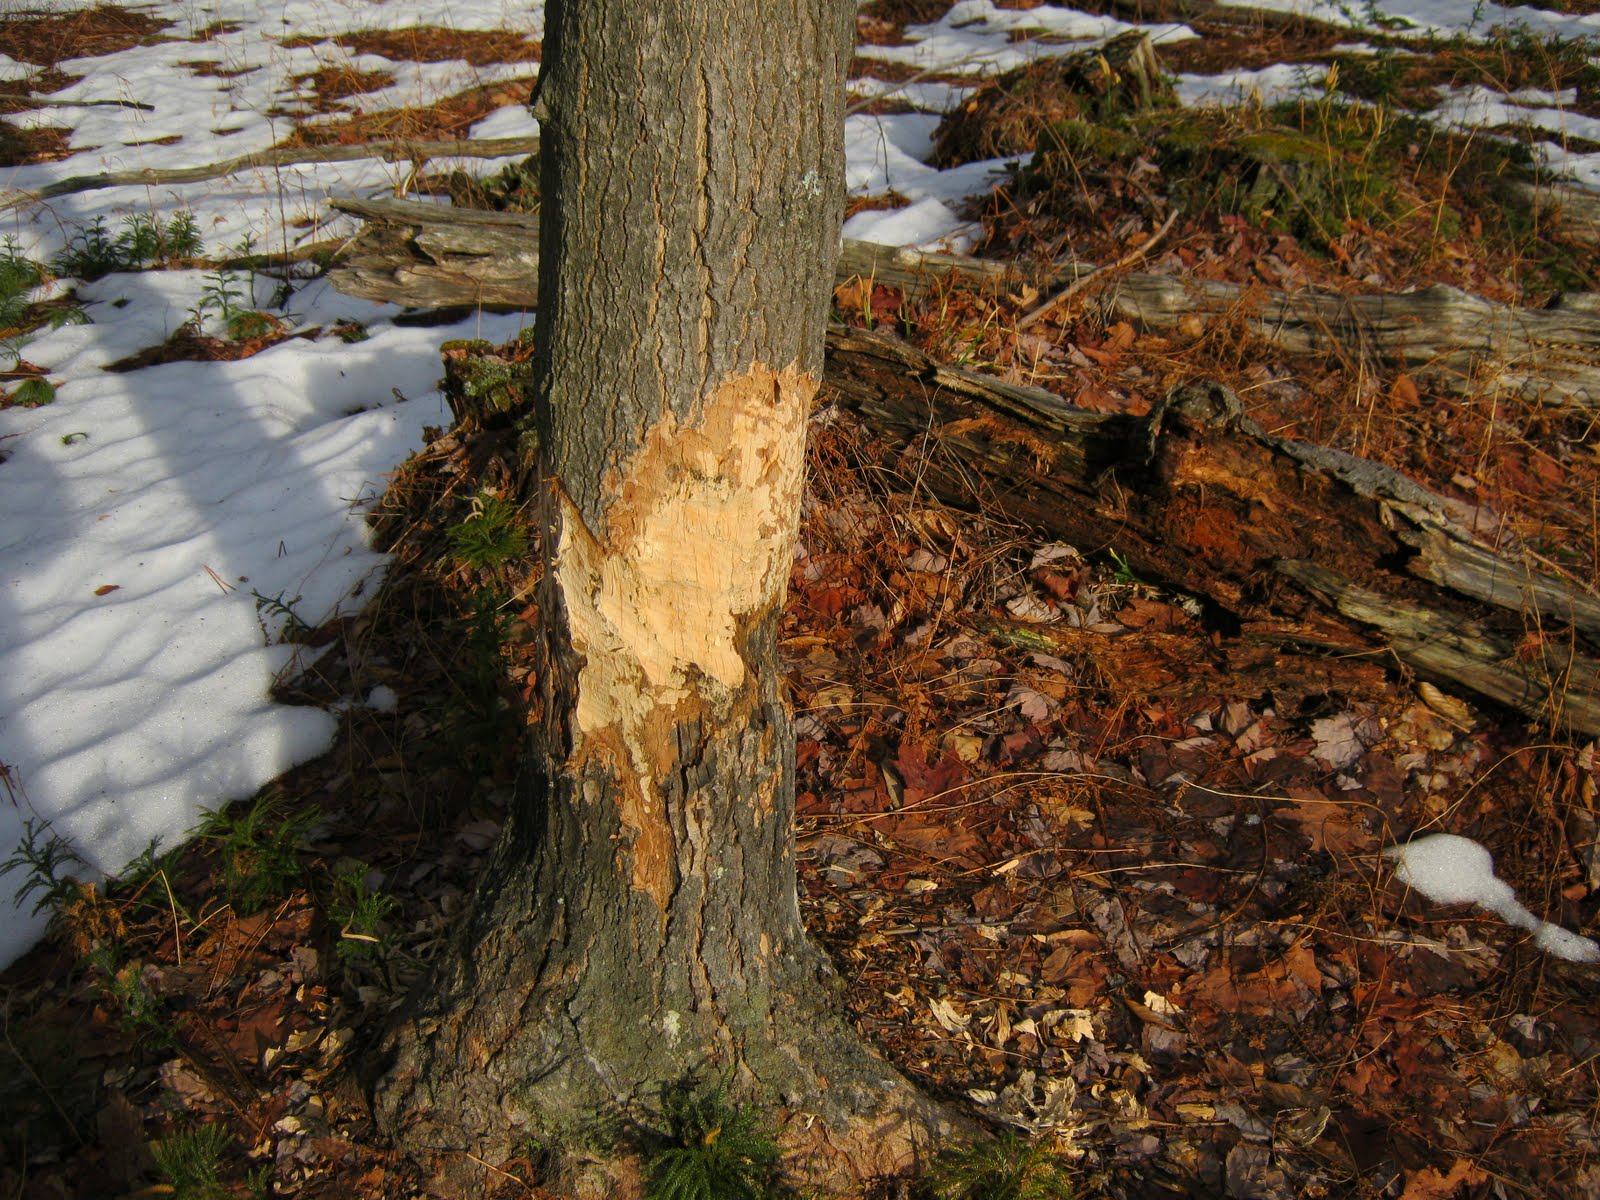
This past weekend I went the to a "hang", a gathering of hammock enthusiasts, in NW Pennsylvania. It was held at Moshannon State Forest near the Marion Brooks natural area at a place called "Beaver Run". Nearby we found plenty of evidence that beavers are indeed active in the area.
One of the reasons for a hang is to test your gear and to take a look at other people's gear and get ideas. When we first planned the hang it looked like it might be very cold and that worried me. Then on the day of the hang it got amazingly warm, but was forecast to be cold and gusty that night. Setting up in warm weather with melting snow all around reminded me of one of the best things about hammocking -- staying above the mud!
Here you can see my bridge hammock (with green underquilt) suspended above a slush pond that formed from my footprints while I was setting up. Because I knew it would get down to about 20F that night I added a second underquilt that my wife had recently made for me. I figured that would keep me warm. But my big concern was the wind. Gusts of 40 mph were called for and the ground was muddy so I was afraid that stakes would not hold.
Enter my new favorite piece of gear. I just got these guys for my birthday. They are REI Snow and Sand Tent Anchors; just simple squares of material with cords connecting to a common point where you tie to. They are lighter than stakes but work great in snow. The picture shows a rock but what you really do is put a bunch of snow in the center and then bury that in more snow and stamp it down. I put these on the windward side of my tarp and hoped for the best. They worked great! Didn't budge an inch and the tarp stood firm all night. In fact in the morning I had significant difficulty getting them out. I had to pound on the ice with the back of a hatchet I borrowed.
The other reason for a hang is to meet people. The people on hammockforums.net are some of the nicest people you'd ever want to meet. The hang was organized by medicjimr who documented the trip with this youtube video. Below are some of the other hangers.
Because Pennsylvania is colder than Missouri I'm finding I need to beef up my winter gear. In the next few posts I'll describe some of the gear I've been testing out his winter.
One of the reasons for a hang is to test your gear and to take a look at other people's gear and get ideas. When we first planned the hang it looked like it might be very cold and that worried me. Then on the day of the hang it got amazingly warm, but was forecast to be cold and gusty that night. Setting up in warm weather with melting snow all around reminded me of one of the best things about hammocking -- staying above the mud!
Here you can see my bridge hammock (with green underquilt) suspended above a slush pond that formed from my footprints while I was setting up. Because I knew it would get down to about 20F that night I added a second underquilt that my wife had recently made for me. I figured that would keep me warm. But my big concern was the wind. Gusts of 40 mph were called for and the ground was muddy so I was afraid that stakes would not hold.
Enter my new favorite piece of gear. I just got these guys for my birthday. They are REI Snow and Sand Tent Anchors; just simple squares of material with cords connecting to a common point where you tie to. They are lighter than stakes but work great in snow. The picture shows a rock but what you really do is put a bunch of snow in the center and then bury that in more snow and stamp it down. I put these on the windward side of my tarp and hoped for the best. They worked great! Didn't budge an inch and the tarp stood firm all night. In fact in the morning I had significant difficulty getting them out. I had to pound on the ice with the back of a hatchet I borrowed.
The other reason for a hang is to meet people. The people on hammockforums.net are some of the nicest people you'd ever want to meet. The hang was organized by medicjimr who documented the trip with this youtube video. Below are some of the other hangers.
![]() |
Because Pennsylvania is colder than Missouri I'm finding I need to beef up my winter gear. In the next few posts I'll describe some of the gear I've been testing out his winter.
Thursday, November 4, 2010
Enhancing the Golite Ultra 20
(Note: In this post I describe a DIY project that several people online have talked about doing but I have never heard of anyone who actually did it. So I decided to share my experience.)
I have written in a previous post about my Golite Ultra 20 down quilt. This has been a good quilt for me but, as others have noted, the temperature rating of 20 degrees was optimistic. I have read that the weight of down used was about 9.5 ounces (270 grams) of high quality (800 fill power) down. The Nunatak Arc Alpinist, a very well respected down quilt, has a 20 degree temperature rating with 11 ounces of down so I do think the people at Golite went a little cheap on the fill. (Because of widespread complaints the newer version of the quilt has more down I understand. The new version doesn't have the "20" in the name and is rated a 3-season quilt.).
This hadn't bothered me very much when sleeping on the ground but in a hammock it was a problem. The reason is that on the ground I put my ccf pad inside the quilt such that it forms a U-shape inside the footbox of the quilt such that my feet don't actually touch the quilt. In the hammock I don't do that and my feet were always cold. After investigating I realized that the baffles in the footbox were only partially filled with down. Here's a picture of my hand inside the footbox. You can clearly see the shape of my finger.

So I decided to buy some down from Thru-Hiker. He sells excellent quality down (900 fill power). The smallest bag you can get has 3.1 ounces in it. Here is the bag next to the quilt.

The mission was to put the down into the quilt. My wife was surprisingly willing to take on this project. She is a very competent seamstress. The first task was too pick open some seams with a "seam ripper" tool.

Once we had made a small hole we tried several methods of inserting the down. A funnel and a pencil worked pretty well but soon we realized that we could go even faster just using our fingers.

For those unfamiliar with the terminology of down sleeping bags and quilts you need to know that inside the quilt are "baffles" made of very fine mesh material. This keeps the down from shifting around too much and leaving cold spots. The areas between baffles, where the down is, are called "chambers". Most of the apparent "seams" you see in a down quilt aren't seams at all. They are just where you see the stitching that holds the baffles to the shell material of the quilt.
We filled the two chambers at the foot end (the part with black fabric) with extra down and then turned to the very bottom of the quilt, where the soles of you feet touch. This was somewhat laborious because there are three small chambers down there.

The quilt was definitely underfilled before. But I worried a bit about putting too much down in each chamber. At the foot end we certainly got close to doing that. If you overstuff the chambers then the down will not be able to fully loft and the insulating value of the down will be compromised. But afterward as I compare the feel of it to well-constructed winter down bags (such as those sold by Western Mountaineering) that I have handled it seems comparable.
The foot end was certainly the high priority. But after stuffing those chambers as full as we dared we still had at least half the down left. So we decided to continue on up the quilt and fill in the chambers that go across the body. This is made a little more difficult than you might think by one of the nice features of the Golite Ultra 20. Many quilts and bags have baffles only running across the body. But of course this means the down can shift to either side of you. The Golite Ultra 20 has additional baffles that run the length of the quilt and keep the down on top of you. This means that we couldn't open the seems at the very edge of the quilt and have access to those important top chambers. So we picked apart the seams where the lengthwise baffles meet the horizontal baffles.
The result is very nice looking. Because of the comparative emptiness of the quilt beforehand the "enhanced" quilt looks like the chambers are full without being overly full.

Inside the quilt feels positively luxurious. The material that Golite uses is very soft to the touch and now that the chambers are bulging with down your feet in particular feel like they are nestled in warmth. I'm really looking forward to trying the improved quilt this winter!
For those interested in tackling this project I will add two points.
1. Thru-hiker's down is REALLY excellent. The tufts of down are huge and fluffy and there are very few feathers to be seen. I highly recommend it. And the quantity (3 ounces) is just right for this project.
2. Working with down involves some clean up, as you can see from the pictures above. However I was surprised how easy it was. We have a Dyson, bagless vacuum cleaner and I was stunned at how well it worked. In just a few minutes the room was completely clean.
I have written in a previous post about my Golite Ultra 20 down quilt. This has been a good quilt for me but, as others have noted, the temperature rating of 20 degrees was optimistic. I have read that the weight of down used was about 9.5 ounces (270 grams) of high quality (800 fill power) down. The Nunatak Arc Alpinist, a very well respected down quilt, has a 20 degree temperature rating with 11 ounces of down so I do think the people at Golite went a little cheap on the fill. (Because of widespread complaints the newer version of the quilt has more down I understand. The new version doesn't have the "20" in the name and is rated a 3-season quilt.).
This hadn't bothered me very much when sleeping on the ground but in a hammock it was a problem. The reason is that on the ground I put my ccf pad inside the quilt such that it forms a U-shape inside the footbox of the quilt such that my feet don't actually touch the quilt. In the hammock I don't do that and my feet were always cold. After investigating I realized that the baffles in the footbox were only partially filled with down. Here's a picture of my hand inside the footbox. You can clearly see the shape of my finger.

So I decided to buy some down from Thru-Hiker. He sells excellent quality down (900 fill power). The smallest bag you can get has 3.1 ounces in it. Here is the bag next to the quilt.
The mission was to put the down into the quilt. My wife was surprisingly willing to take on this project. She is a very competent seamstress. The first task was too pick open some seams with a "seam ripper" tool.
Once we had made a small hole we tried several methods of inserting the down. A funnel and a pencil worked pretty well but soon we realized that we could go even faster just using our fingers.
For those unfamiliar with the terminology of down sleeping bags and quilts you need to know that inside the quilt are "baffles" made of very fine mesh material. This keeps the down from shifting around too much and leaving cold spots. The areas between baffles, where the down is, are called "chambers". Most of the apparent "seams" you see in a down quilt aren't seams at all. They are just where you see the stitching that holds the baffles to the shell material of the quilt.
We filled the two chambers at the foot end (the part with black fabric) with extra down and then turned to the very bottom of the quilt, where the soles of you feet touch. This was somewhat laborious because there are three small chambers down there.
The quilt was definitely underfilled before. But I worried a bit about putting too much down in each chamber. At the foot end we certainly got close to doing that. If you overstuff the chambers then the down will not be able to fully loft and the insulating value of the down will be compromised. But afterward as I compare the feel of it to well-constructed winter down bags (such as those sold by Western Mountaineering) that I have handled it seems comparable.
The foot end was certainly the high priority. But after stuffing those chambers as full as we dared we still had at least half the down left. So we decided to continue on up the quilt and fill in the chambers that go across the body. This is made a little more difficult than you might think by one of the nice features of the Golite Ultra 20. Many quilts and bags have baffles only running across the body. But of course this means the down can shift to either side of you. The Golite Ultra 20 has additional baffles that run the length of the quilt and keep the down on top of you. This means that we couldn't open the seems at the very edge of the quilt and have access to those important top chambers. So we picked apart the seams where the lengthwise baffles meet the horizontal baffles.
The result is very nice looking. Because of the comparative emptiness of the quilt beforehand the "enhanced" quilt looks like the chambers are full without being overly full.
Inside the quilt feels positively luxurious. The material that Golite uses is very soft to the touch and now that the chambers are bulging with down your feet in particular feel like they are nestled in warmth. I'm really looking forward to trying the improved quilt this winter!
For those interested in tackling this project I will add two points.
1. Thru-hiker's down is REALLY excellent. The tufts of down are huge and fluffy and there are very few feathers to be seen. I highly recommend it. And the quantity (3 ounces) is just right for this project.
2. Working with down involves some clean up, as you can see from the pictures above. However I was surprised how easy it was. We have a Dyson, bagless vacuum cleaner and I was stunned at how well it worked. In just a few minutes the room was completely clean.
Subscribe to:
Posts (Atom)